The Windows Remote Desktop Connection tool gives users the ability to connect to a remote Windows PC or server over the internet or on a local network, giving them full access to the tools and software installed on it. This is made possible by Microsoft’s own Remote Desktop Protocol (or RDP for short).
All Windows PCs and servers can use RDP to connect to another Windows device, but only certain versions of Windows allow RDP connections. This proprietary protocol rivals the open-source Virtual Network Computing (VNC) protocol commonly used on Linux and other platforms.
What is RDP?
The Remote Desktop Protocol allows remote users to see and use Windows on a device in another location. Key peripherals like your keyboard and mouse are shared with the remote machine, allowing you to use and control it as if you were sat right in front of it.
For RDP connections to work, you need two components—an RDP server and an RDP client. A typical RDP server is the Windows PC or server you’re connecting to and will control. The client is a PC or mobile device with an RDP client app installed, from which you control the server. Microsoft offers its own client for Windows, macOS, Android, and iOS, with various third-party options available for Linux and other platforms.
RDP is a Windows-only protocol, and you can only establish remote connections using RDP with Windows PCs and Windows Server installations that support it. Not all versions of Windows do—Windows 10 Home, for instance, can only be used as a client to connect to other Windows Remote Desktops, not the other way around.
You can only establish a single connection to Windows PCs that have remote desktop enabled. To connect multiple users at once, you’ll need a Windows server with the Remote Desktop Services (RDS) component installed and enabled.
If you want to establish RDP connections to a secure enterprise network from a remote location, you’ll also need the Remote Desktop Gateway service installed and configured on a suitable Windows Server installation. This also offers increased security, replacing the need for an internal virtual private network (VPN).
How to enable Remote Desktop connections on Windows
To use RDP to connect to another Windows PC or server, you’ll first need to enable it on the remote server or PC. Thankfully, configuring Windows to enable Remote Desktop is a fairly straightforward process.
To enable Remote Desktop on Windows PCs:
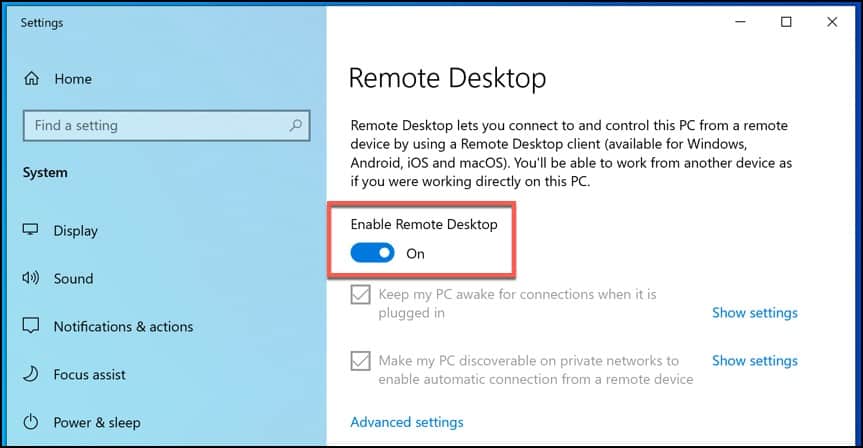
- Open the Windows Settings menu. To do this, click the Start button, then press the Settings icon. From here, press System > Remote Desktop.
- Press the Enable Remote Desktop slider to move it to the On position. The slider will turn blue when Remote Desktop has been enabled.
- By default, the Microsoft account you use to sign in will be the account you use to connect to your PC remotely. To allow additional users to connect, press Select users that can remotely access this PC. In the Remote Desktop Users window, press Add and search for the user account.
- To allow for RDP connections over the internet, you’ll typically need to allow incoming and outgoing connections to TCP/UDP port 3389 on your network, unless port forwarding is in effect.
Tips for establishing secure Windows Remote Desktop connections
Any kind of remote desktop solution opens a hole that can potentially be exploited. RDP is no different, and the RDP port (port 3389) is well known and regularly scanned for exploits. If you plan to use Windows Remote Desktop over the internet, you need a strategy in place to secure it.
Enterprise users can use Remote Desktop Gateways to help provide a secure way to connect to an RDP server, but standard Windows users don’t have this luxury. Instead, you’ll need to use some common-sense solutions to establish secure RDP connections. Some tips for establishing a secure RDP connection include:
- Don’t allow open RDP connections over the internet. If you need to use Windows Remote Desktop over the internet, set up your own virtual private network (VPN) or use an RD Gateway to create a secure tunnel to your local network first. Allowing an open RDP connection over the internet is extremely risky, so don’t leave it to chance.
- Enable Network Level Authentication (NLA). This should be enabled by default in Windows 10, Windows Server 2012, and newer, but if you’re using older versions of Windows, you should enable this—it ensures that a connection can only occur when it is properly authenticated and a right username and password is provided.
- Restrict RDP connections to non-administrators. You should only allow non-administrator user accounts to remotely connect to Windows PCs. Standard user accounts can’t change settings, install software, and have limited access to files. This should limit the damage that any potential rogue connection could make.
- Limit password attempts. You should limit the number of incorrect passwords on an account before it is locked out, which should limit any damage from a denial of service attack.
- Use complex, secure passwords. Using secure passwords is good advice for any situation, but especially for Windows Remote Desktop connections. Don’t use the same password for multiple accounts, and use a combination of letters, numbers, and symbols.
- Set RDP for maximum encryption. By default, RDP connections will always try to use the highest possible level of encryption. To ensure that the highest level of encryption is always used, however, you can set the default encryption level using the Group Policy Editor (Computer Configuration > Administrative Templates > Windows Components > Remote Desktop Services > Remote Desktop Session Host > Security > Set client connection encryption level > Enabled > High Level).
Connecting to a Remote Desktop on Windows
All Windows PC and Windows Servers have the Remote Desktop Connection tool available as part of the default installation. That includes older versions of Windows such as Windows 7 and 8. If you want to connect to a Windows Remote Desktop using another Windows PC, you can use this tool.
If you’re connecting to another PC on your local network, you’ll need to find the local IP address or hostname first. You can do this by clicking Windows Settings > Network & Internet > View your network properties to view information about your Remote Desktop PC, including the hostname and local IP address.
You’ll need to know the ISP-issued IP address for your internet connection if you’ve accepted the risks and you’re connecting to a Windows Remote Desktop over the internet. Just Google search “what’s my IP” to find it. For secure, enterprise networks, you’ll also need to know the RD gateway address.
To connect to a Windows Remote Desktop on another Windows PC or server:
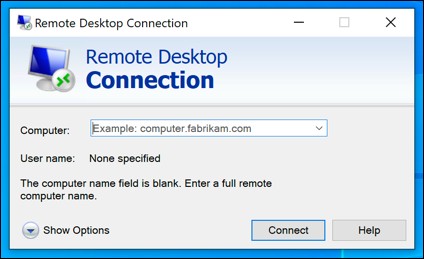
- Press Windows key + R on your keyboard, type mstsc into the Run dialog box, then press OK to launch the Remote Desktop Connection tool. Alternatively, press the Start button, then press Windows Accessories > Remote Desktop Connection.
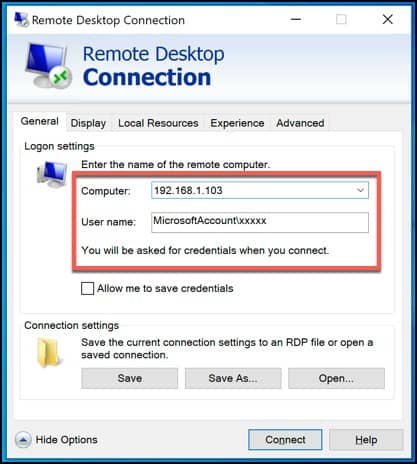
- Type the IP address or hostname of your Windows Remote Desktop in the Computer text box, then press Show Options.
- Type the username you’ll use to connect to your Windows Remote Desktop in the User name box.
- Confirm the display resolution and color quality of the remote connection under the Display tab.
- You can confirm the peripherals you intend to share with your Windows Remote Desktop by pressing Local Resources > More. This will allow you to share your local printer with the remote PC, for instance.
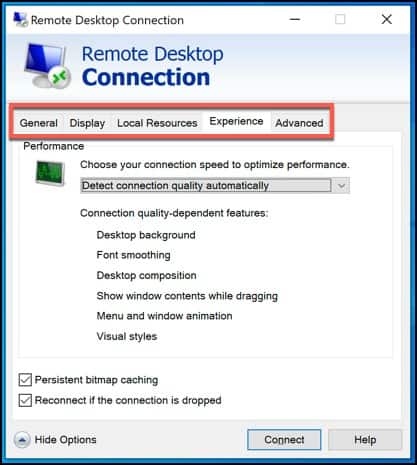
- Windows will automatically try to determine the quality of your remote connection. If you want to set this manually, choose your connection speed under the Experience tab.
- Certain enterprise networks require you to use a Remote Desktop Gateway to allow for a tunneled RDP connection to a secure network. You can set this by clicking Advanced > Settings.
- Once you’re ready to make the connection, press Connect. You may need to press Yes to a warning about the identity of the connection..
Connecting to a Windows Remote Desktop on macOS
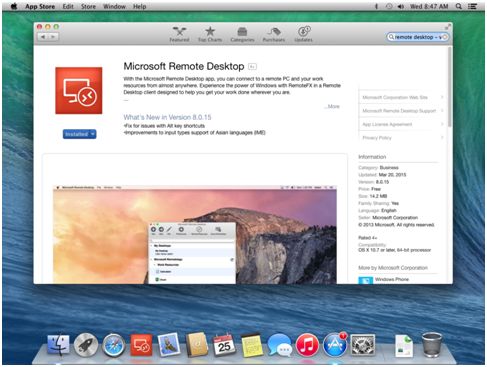
Microsoft offers its own Remote Desktop app for macOS, which can be installed from the App Store. The interface for the Microsoft Remote Desktop app is similar to the iOS and Android clients offered by Microsoft for mobile users, so many of the steps below will be similar on those platforms.
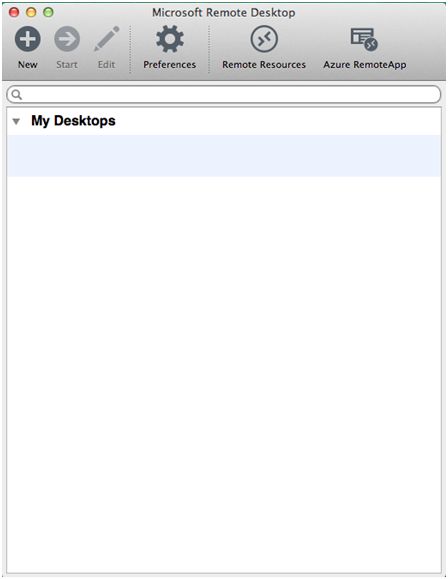
To connect to a Windows Remote Desktop using the Microsoft Remote Desktop app on macOS:
- Click the Add PC button (if you haven’t already added a remote connection) or press the + button > Add PC.
- Type the hostname or IP address for your Windows Remote Desktop in the PC name box.
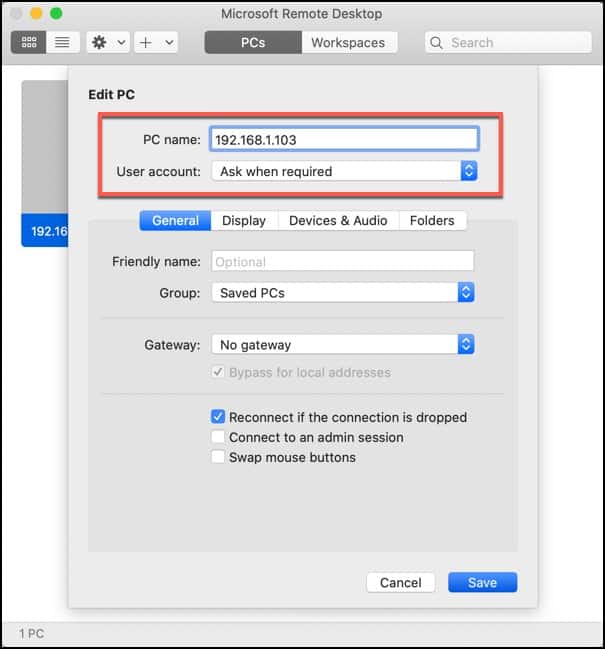
- To add a username and password to your connection, click the User account drop-down menu and select Add a user account. Provide the username and password you’ll use to connect, then press the Add button.
- If you’re connecting to an RDP server on an enterprise network, you may need to provide a Remote Desktop Gateway address. You can add this by selecting Add Gateway under the Gateway drop-down menu.
- Confirm the display quality, resolution, and color settings under the Display tab.
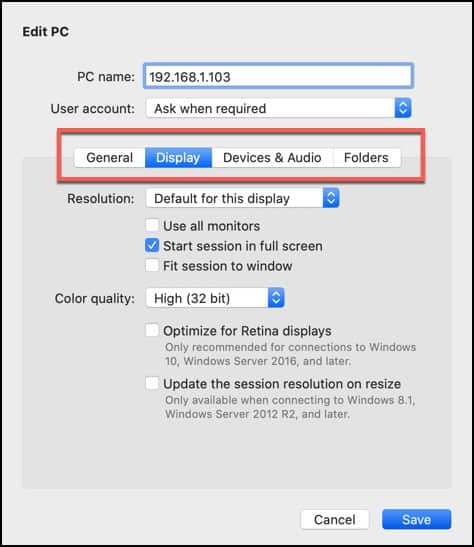
- You can select which peripherals you’d prefer to share with your Windows Remote Desktop under the Devices & Audio tab.
- To share any folders on your Mac with the RDP server, add these under the Folders tab, pressing the + button to find and select them.
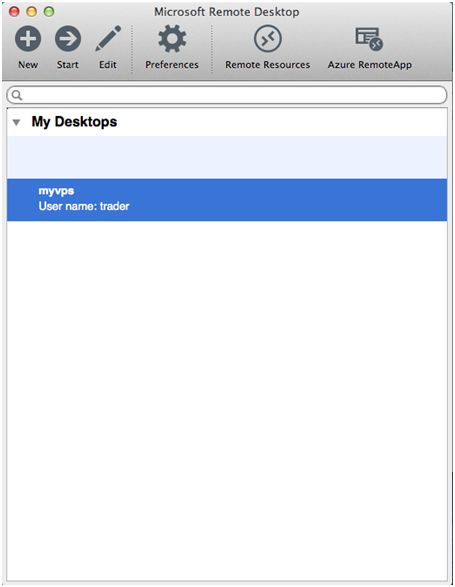
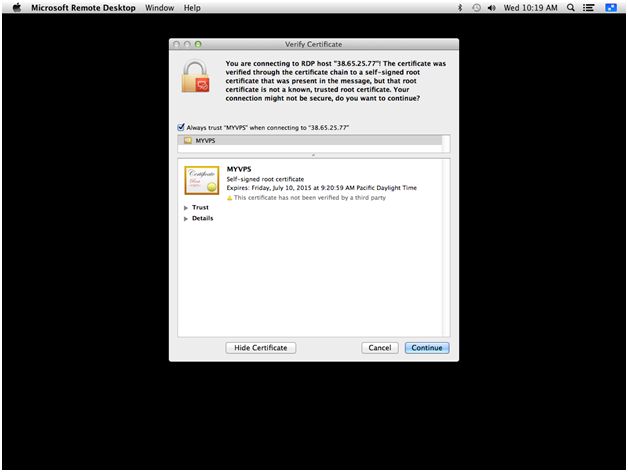
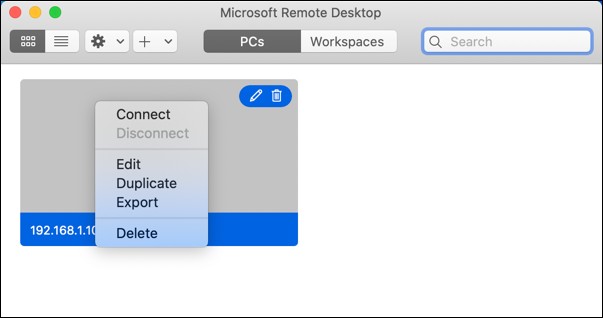
- Press Add to save the settings for this Windows Remote Desktop connection. In the main Microsoft Remote Desktop screen, double-click on the entry to connect or right-click and press Connect, pressing Continue to accept the warning about the identity of the connection immediately afterward.
Alternative tools for remote desktop connections
As we’ve mentioned, RDP connections generally require a Windows element, and while third-party RDP servers like xrdp do exist for platforms like Linux, these are generally inferior to other remote connection tools like VNC.
Some alternative free remote desktop tools, as well as paid options, use other protocols to view and control a remote PC or server. A selection of some of the best alternative tools for remote connections on all major platforms are:
- SolarWinds Dameware EDITOR’S CHOICE offers remote support and control tools to enterprise support teams, both in-house and MSPs. It’s cloud-based, but you can install a local version to on-site Windows PCs and servers. It offers multi-factor authentication., multi-platform support and integrates with SolarWinds Help Desk solutions. There is a 14-day free trial.
- ISL Online is a cloud-based remote desktop and support tool for multiple platforms, with on-site installation possible. ISL Online allows you to establish secure RDP connections between your PC and a remote desktop without compromising your network by making changes to your firewall or by using a VPN. 15-day free trial.
- ManageEngine Remote Access Plus is another MSP favorite, with both cloud-based and in-house control options and support for Linux, Windows, and macOS devices.
- RemotePC provides encrypted remote desktop access for Windows and macOS, with a free plan available for single PCs.
- TeamViewer is a free remote desktop and support tool for consumers, with paid plans for enterprise users and support for all major operating systems.
- Chrome Remote Desktop is a quick, lightweight, and free remote desktop solution that you can use from within the Google Chrome browser on major platforms.
- Remmina is an open-source remote desktop solution, allowing you to connect using either RDP or VNC, depending on your requirements. It supports major Linux operating systems and works on embedded platforms like the Raspberry Pi.
Using RDP, VNC or another remote desktop protocol
It doesn’t matter whether you use RDP, VNC, or another remote desktop protocol to connect to a remote PC. A seamless experience is what matters, and for most Windows users, using RDP with the Windows Remote Desktop Connection tool will offer the simplest and smoothest experience for remote working.
That doesn’t mean it’s necessarily the best option. Other free remote desktop tools like TeamViewer are easy to install and use, while SolarWinds Dameware is great for enterprise users, especially for multiple clients.
Which is your favorite remote desktop tool? Let us know in the comments below.